Changing oil is not hard. Really. 3 basic steps: (1) old oil out; (2) change oil filter; (3) new oil in.
To start, you will need to pull out your instruction manual and figure out what weight of oil and how much of it you need. Oil weight is usually 5W-30 for colder months, 10W-30 for warmer. Four cylinder cars usually need 4 to 5 quarts, six cylinders use about 5, 8 cylinders between 6 and 7, and the mister’s big diesel takes 8 quarts. Look up “engine oil” in the index of your owner’s manual and you’ll be able to find the information.
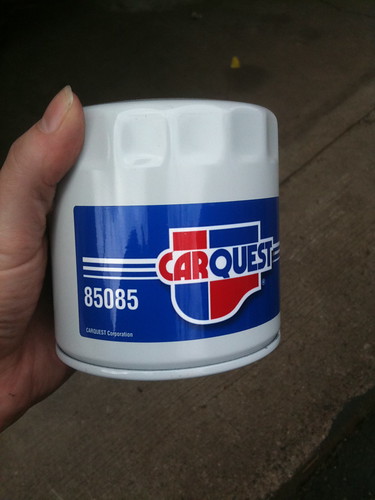
Next up, head to the auto parts store. Pick up the oil you need and a new filter. There are books or computers where you can look up the make/model/year of your car and get the filter number, or you can ask the guy behind the counter.

(Tip about being a woman in an auto parts store: you will always, always get service. The men that work there will jump over themselves to help you. Ask all the stupid questions you want; I’ve never met an asshole at an auto parts store. If you do meet an asshole, leave. There’s another store a block up, I bet, and the guy there will be nice.)
Other items necessary: a wrench that fits the drain plug, a place to drain the oil, and potentially ramps if your car sits lower than my Jeep. You will also want paper towels. Lots of them, if you’re me and kind of messy or squeamish about goop on your hands. Also, do not wear clothing you like for this. You will be laying on the ground and getting dirty. Your old jeans and a shirt stolen out of your husband’s closet will do just fine.
 N
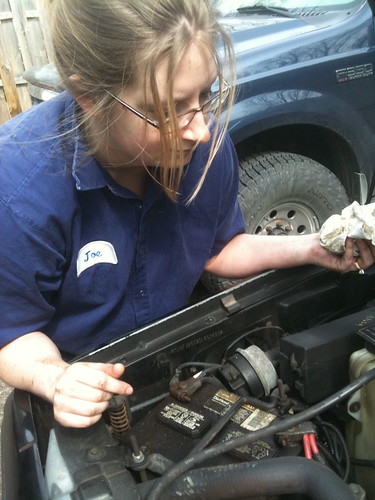
N Note the shirt. The mister wore it a hundred years ago. I stole it about 5 years ago. Mine now.
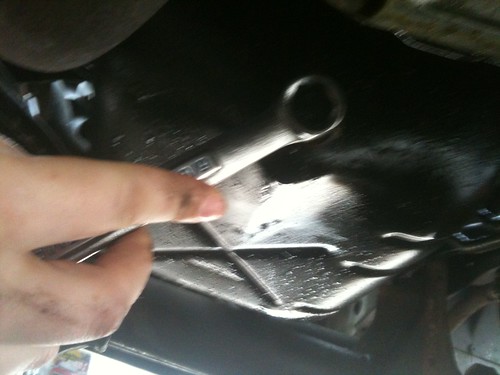
There might be some trial and error to find a wrench that fits. My jeep uses a 5/8” but my last car used a 10mm. If you don’t know, either get an adjustable wrench or bring the whole damned set with you to the car.

Part one: warm up your car. Start the engine and let it run for a couple of minutes. If you need to put it up on ramps, do it now. Turn it off.
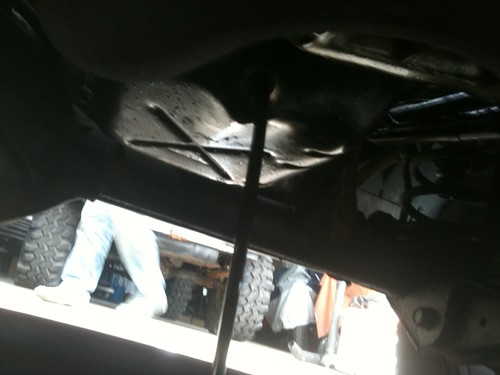
Next, get under the car with your wrench and your drain bucket. Being under a car can be a tiny bit claustrophobic. I was surprised at how uncomfortable I was. Take a minute if you have to and get used to it. Then, find the drain plug. It will be at the end of a square, flat pan (your oil pan) towards the front and center of your car.

See if your wrench fits. If you’re me, it won’t. Get out from under the car, smack head on the bumper, get other wrench, try again. When you’ve got one that fits, you’re good. I’ve heard tell of adjustable wrenches for this, but, frankly, I prefer a closed-end wrench, so I dick around with finding one that fits. Position the drain bucket under the drain plug, loosen the drain plug slowly at first to make sure the oil will drain where you want it to, then take the plug all the way out.
You might need to use a lot of power to get that plug loose at first; oil change places use pneumatic tools to tighten the plug and it might be really stuck on there. Elbow grease and, occasionally, finding someone a tiny bit stronger than you to give it a good whack can help. Be cautious because if your hand slips off that wrench and you whack your knuckles, it hurts and you will bleed. I do it every time, though.
Sometimes the car gods demand a little blood sacrifice.
Let the used oil drain.
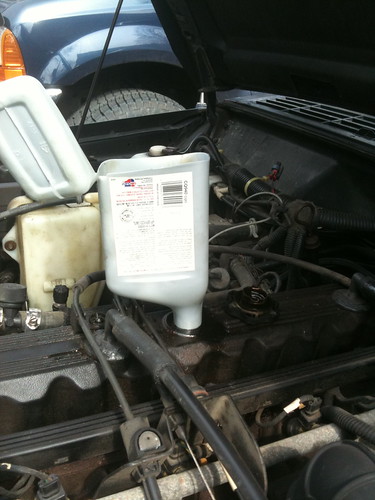
Do something else for a few minutes, like top off your windshield washer fluid, check your tire pressure, or dig all the trash out from under your seats. The mister just waits under the car for the oil to drain but I don’t have that kind of patience.
Once the oil has drained, replace the plug. Do it. Do it now. Do not forget. It does not need to be super tight; you do not need to super-man it into place. Jiffy-lube type places always crank these things in super hard; this is completely unnecessary. Just twist until it’s tight, then give it one good oomph with the wrench. We’re going to check for leaks later, so don’t get too worried.
Then, you want to replace the filter. Take your new one out of the box. Get a good look at it.
Now look around your engine for something that looks similar. Usually one of the few pieces of bright color inside an otherwise gray and black engine, it shouldn’t be too tricky to find.
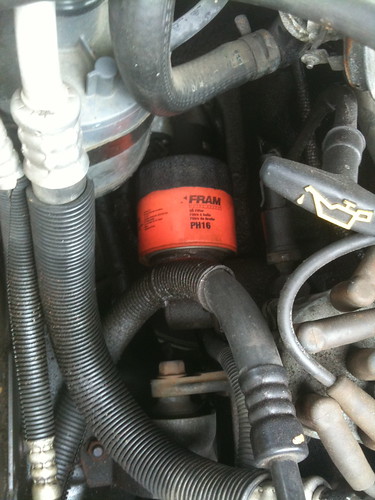
Assess. Is it easier to reach from up top or under the car? In my old Monte Carlo, the oil filter was stupidly positioned and involved acrobatics and contortionist-style movements to remove. The Jeep is significantly more user friendly and I can reach straight down from the top and pull it right out.
Position the drain bucket under the oil filter.
Note: If you are removing the oil filter from under the car, do not lay right under it. The oil filter is full of oil and the second the seal loosens, oil comes gushing out. You do not want that shit in your hair.
Remove the oil filter by unscrewing it. This can be challenging, since sometimes it’s on kind of tight and, in the case of my Monte Carlo, it can be difficult to squeeze your hand up there, but you can do it. I know you can. One of those rubber grippy things you use to get the top off of pickle jars can come in handy right here.
Be prepared for oil to come out of filter. This is why we put the drain bucket under there. Unscrew it as quickly as possible and tip it upright to prevent any more oil from leaking out. Check the top of the old filter for a rubber gasket – it’s the only piece of nonmetal on there. If it’s not there, check around where you just took the filter off; you want to make sure that piece of rubber is gone. If it gets left behind it will cause problems.
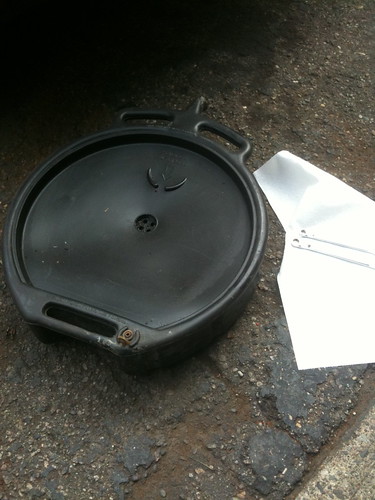
Set the old filter aside to drain on your drain pan.
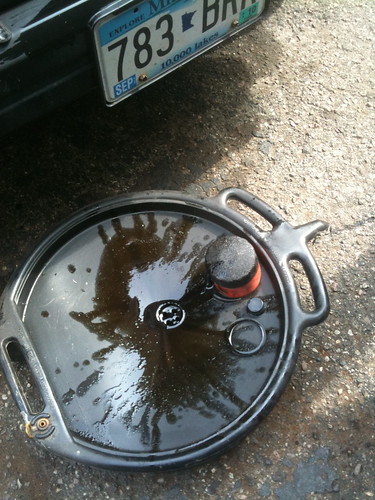
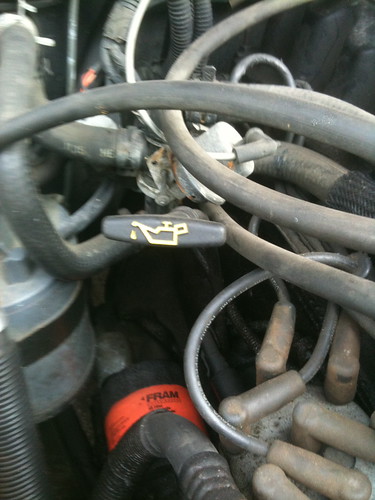
Note that in this photo the gasket (round circle) is sitting near the draining filter. That's because it fell off when I was removing the old filter and I had to fish around to find it. I stuck it on the pan so I didn't lose track of it again.
Pick up your new filter and dip your finger into your old oil (I know – yuck). Rub the old oil around the gasket at the top of your new filter. This does two things: (1) gets you a good seal, preventing possible oil leaks, and; (2) keeps the gasket from drying out. Extreme heat or cold (see also: Minnesota in August or January), driving on gravel roads, and basic daily driving can dry out this little gasket and cause leaks.
Slip the new oil filter into place and screw in. It does not to be super tight, just snug.
Next, look down at the engine and locate the screw cap marked “engine oil.”

Unscrew it and, hey, look, a hole into which you will pour those quarts of oil you bought before.
Pour in your new oil. I’ve heard of people using funnels for this, but I’ve never purchased one. I just half-ass a funnel using the first quart of oil and a knife. Works for me!
Put the screw cap back on and start her up. Let your car run for a few minutes. We do this to cycle the oil through the engine, getting rid of any air pockets and filling up the oil filter. While the car is running check underneath for any leaks or drips. If you dripped any oil while you were pouring the new oil in, you might smell a bit of burning oil. Do not panic. If the smell doesn’t dissipate in a few moments or you smell it again the next time you start up your car, then worry, but for now, let it go. If you’re dripping from the oil plug, get under there and tighten it up a little bit more. If you’re dripping from the filter, snug it up too.
After a few minutes of running, if there are no leaks, turn the car off and use the dipstick to check the oil level.
Pull the dipstick out, wipe it off with a paper towel, put it back in ALL THE WAY, and pull it out. Check the bottom to see if you need to add oil.

New oil will not be very dark, so you might need to stand in the sunlight and turn it a bit to see the oil on the stick. Your dipstick might have hash marks instead of a safe/add line like mine. If it says you need to add oil, add a little, run the car, and check again.
Gather up your tools, giving them a good wipe before putting them away. A good mechanic keeps clean tools and keeps them in a place where she can find them.
To deal with your used oil, recycle it. Do NOT just pour your oil onto the ground or toss it into the trash. Nearly any auto parts store will recycle oil. Ask when you buy your new oil at the store; if they don’t recycle it, they’ll know who does.
I have this particular drain pan because it is has a spout, making it easy to pour out of it and into a gallon jug with a lid, making hauling it up to the store a much less messy proposition.
Congratulations, kid, you did it.
4 comments:
You are a badass. I wish I could say I had ever changed my own oil, but that would be a lie. It's nice to know I've got a handy guide right here if I ever get a wild hair to do it, though.
Awesome. You rock!
You are the bomb.com girl! I am in awe of your oil-changing skills.
You should seriously try to sell this article to another website for publication. It is an awesome how-to.
Post a Comment